
DATV RX Tutorial: Difference between revisions
No edit summary |
mNo edit summary |
||
| (One intermediate revision by the same user not shown) | |||
| Line 1: | Line 1: | ||
{{Documentation navigation}} | |||
== Before starting == | |||
* Install [https://www.sdrangel.org/ SDRangel]. | |||
* Obtain a current compatible receiver endpoint and port from the SimTX server operator. | |||
* Obtain the station frequency, DVB standard, modulation, symbol rate, and code rate from the transmitting station. These must match the signal. | |||
== 1. Add the receiver == | |||
# Open SDRangel and add an RX device. | |||
# Choose '''RemoteTCPInput'''. | |||
# Enter the current receiver address and port, then set a sample rate wide enough for the signal. | |||
<gallery mode="packed" heights="220"> | |||
File:RX1.png|Open SDRangel. | |||
File:RX2.png|Add an RX device. | |||
File:RX3.png|Choose RemoteTCPInput. | |||
File:RX4.png|Set the receiver connection and sample rate. The original illustration uses argon.simtx.net:1240 and 2000000 samples/s; confirm the current endpoint separately. | |||
</gallery> | |||
== 2. Add the DATV decoder == | |||
# Add a channel and choose '''DATV Demodulator'''. | |||
# Tune to the transmission and enter the matching DVB parameters. | |||
# Start the receiver and look for decoder activity. | |||
The companion example uses '''DVB-S2, QPSK, 100000 symbols/s, and code rate 3/4'''. The pictured decoder bandwidth is 200000 Hz. Use different values when the transmitting station requires them. | |||
<gallery mode="packed" heights="220"> | |||
File:RX5.png|Add a channel. | |||
File:RX6.png|Choose DATV Demodulator. | |||
File:RX7.png|The decoder is added. | |||
File:RX8.png|Set the parameters to match the transmitter. | |||
File:RX9.png|Start reception after checking the setup. | |||
</gallery> | |||
== 3. Send the video to a player == | |||
# Enable '''UDP''' output in the DATV demodulator. | |||
# For a player on the same computer, set address <code>127.0.0.1</code> and port <code>8888</code>. | |||
# Install and open [https://potplayer.tv/ PotPlayer], the player used in the original Windows example. | |||
# Open its playlist, select '''ADD''' > '''Add URL''', and enter <code>udp://127.0.0.1:8888</code>. | |||
# Start playback while the decoder is receiving data. | |||
'''The ports must match.''' An earlier decoder screenshot shows 8882, while the playback sequence uses 8888. For this sequence set both ends to 8888. | |||
<gallery mode="packed" heights="200"> | |||
File:RX21.png|Configure UDP output to 127.0.0.1:8888. | |||
File:RX22.png|Install the player used in the example. | |||
File:RX23.png|Open the playlist. | |||
File:RX24.png|Choose ADD. | |||
File:RX25.png|Choose Add URL. | |||
File:RX26.png|Enter udp://127.0.0.1:8888. | |||
File:RX27.png|Run the receiver and player together. | |||
</gallery> | |||
== If there is no picture == | |||
First check whether SDRangel receives the signal. Next check decoder parameters and data activity. Only then check the UDP address, port, and player. A running player cannot display video if the receiver has not decoded a transport stream. | |||
[[Category:SimTX]] | |||
Latest revision as of 22:17, 13 September 2026
Before starting[edit | edit source]
- Install SDRangel.
- Obtain a current compatible receiver endpoint and port from the SimTX server operator.
- Obtain the station frequency, DVB standard, modulation, symbol rate, and code rate from the transmitting station. These must match the signal.
1. Add the receiver[edit | edit source]
- Open SDRangel and add an RX device.
- Choose RemoteTCPInput.
- Enter the current receiver address and port, then set a sample rate wide enough for the signal.
-
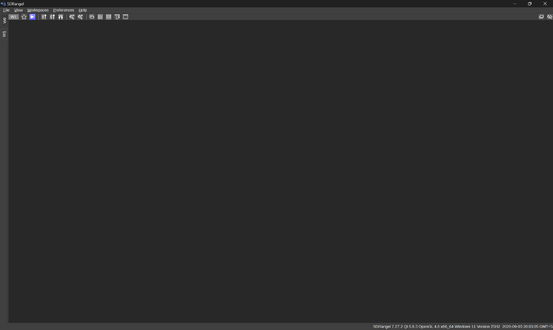 Open SDRangel.
-
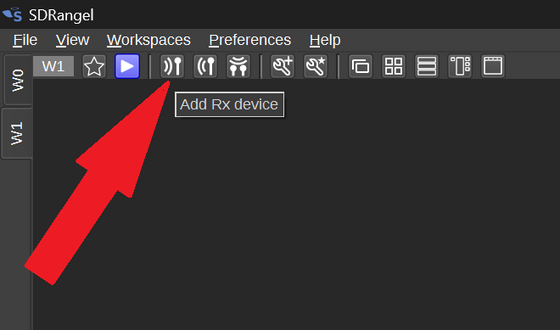 Add an RX device.
-
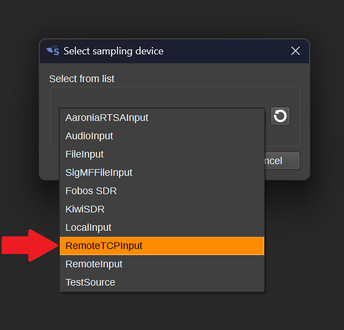 Choose RemoteTCPInput.
-
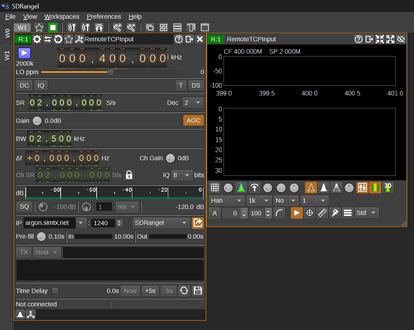 Set the receiver connection and sample rate. The original illustration uses argon.simtx.net:1240 and 2000000 samples/s; confirm the current endpoint separately.


2. Add the DATV decoder[edit | edit source]
- Add a channel and choose DATV Demodulator.
- Tune to the transmission and enter the matching DVB parameters.
- Start the receiver and look for decoder activity.
The companion example uses DVB-S2, QPSK, 100000 symbols/s, and code rate 3/4. The pictured decoder bandwidth is 200000 Hz. Use different values when the transmitting station requires them.
-
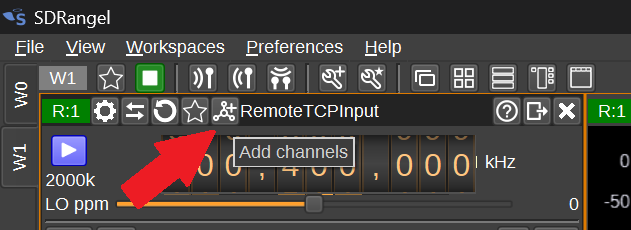 Add a channel.
-
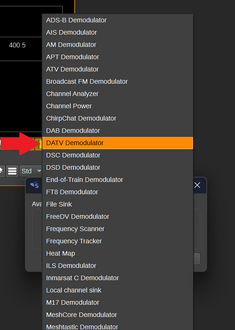 Choose DATV Demodulator.
-
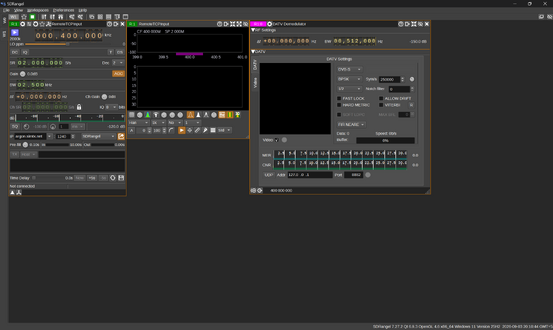 The decoder is added.
-
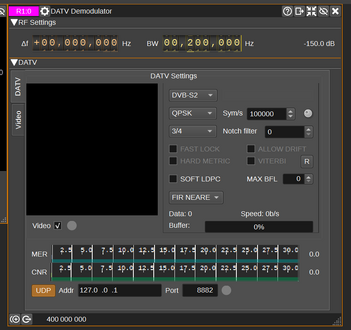 Set the parameters to match the transmitter.
-
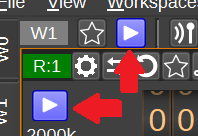 Start reception after checking the setup.


3. Send the video to a player[edit | edit source]
- Enable UDP output in the DATV demodulator.
- For a player on the same computer, set address
127.0.0.1and port8888. - Install and open PotPlayer, the player used in the original Windows example.
- Open its playlist, select ADD > Add URL, and enter
udp://127.0.0.1:8888. - Start playback while the decoder is receiving data.
The ports must match. An earlier decoder screenshot shows 8882, while the playback sequence uses 8888. For this sequence set both ends to 8888.
-
 Configure UDP output to 127.0.0.1:8888.
-
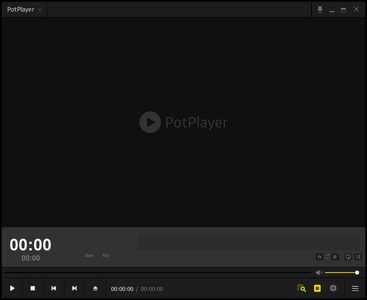 Install the player used in the example.
-
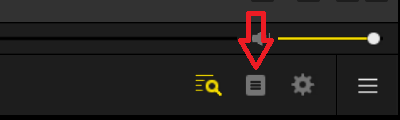 Open the playlist.
-
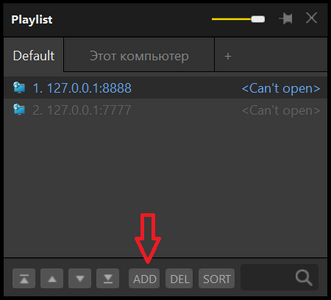 Choose ADD.
-
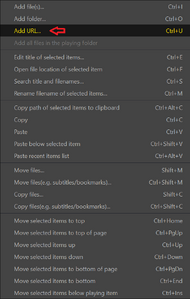 Choose Add URL.
-
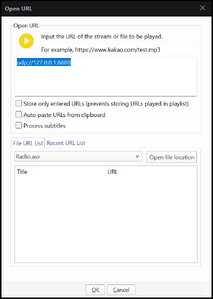 Enter udp://127.0.0.1:8888.
-
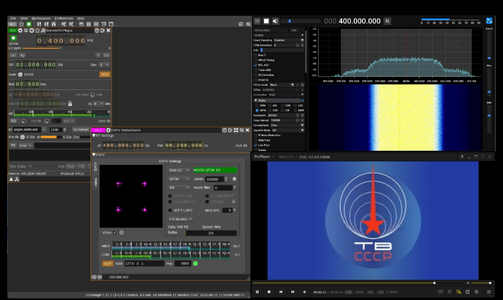 Run the receiver and player together.


If there is no picture[edit | edit source]
First check whether SDRangel receives the signal. Next check decoder parameters and data activity. Only then check the UDP address, port, and player. A running player cannot display video if the receiver has not decoded a transport stream.